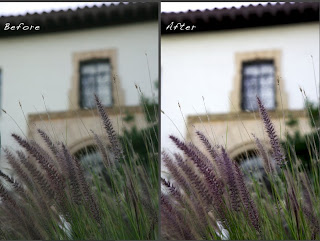
In one of my current classes, I had my eyes opened to the importance of setting a black point correctly. I saw before and after images of mine - the composition didn't change, all that changed was that black (adjust with levels), white (adjust 2nd with levels), and midtones (adjust 3rd with curves) were set correctly - and Wow. With black and white, "[w]atch for the threshold where pure black shows up. Every image is different; some look best with just a bit of black, others with a lot. But except for foggy or hazy images, there should be a black in the photo. Set the white, right slider, similarly."
I took the image below this past Saturday at twilight laying on my back on the ground shooting my camera upwards (my goal was to give context to the flowers). The adobe in the background was bathed in soft light and contrasted nicely with these purple flowers. The JPEG created by the camera - Before image - has a color cast and lost the purple that attracted me to the flowers. Setting the black, white, and adjusting the midtones yielded the JPEG on the right (also adjusted the horizon in ACR).
Check out Rob Sheppard's website, to learn more about some techniques that will help your photos.
Credits: All images taken by Eden Hensley Silverstein for The Road to the Good Life.
